Building a tadpole is one thing, but adding various upgrade modules to your vehicle to handle different situations is the next step. Subnautica 2. The same goes for early tools like scanners and sonic resonators. Both need meaningful upgrades late in the game.
As soon as you discover the Alien Ruins, it's best to focus on upgrading your Tadpole to reach deeper parts of the ocean.. Without certain upgrades and modifications, your game progress will be halted, so it's important to build modification machines in your base and get the recipes you need as quickly as possible.
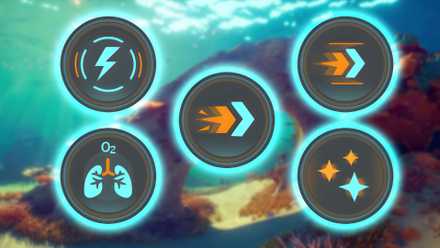
All biomods in Subnautica 2 and how to get them
Biomods are passive and active skills in Subnautica 2 that can provide essential buffs for exploration and survival. It's all here!
This is an upgrade that targets only the personal tools you want. As of now, only two tools have had their variants upgraded.
bioscanner

- Blueprint location: From Alien Ruins, travel 540 meters in a direction 125 degrees. The blueprints are inside the broken base.
- Recipe: Scanner (1x), enameled glass (2x) and conduit crystal (3x)
Bioscanner is your main tool for unlocking new Biomods. Passive and active skills that provide access to various buffs can make your explorations more beneficial.
Regardless of whether you've already scanned all your creatures, when you upgrade to a Bioscanner, you'll need to re-scan certain creatures to unlock their creature mods.
The Bioscanner is also needed to complete the campaign mission: Repairing a Broken Turbine in an Alien Power Plant.
feedback resonator

- Blueprint location: The first instance is near the swimming pool at Metal Farms. Head northeast from the Angel Comb in the Alien Ruins area to find it. The second instance is also in Metal Farms. It is located on a platform at the far end of the green pool.
- Recipe: Sonic Resonator (1x), Enameled Glass (2x), Conduit Crystal (2x) and Strontium (2x)
The main difference between the Feedback Resonator and its predecessor is the fact that it has a longer range.
Sonic Resonator requires you to shoot resource nodes and Bloom Biofilms from a very close range. However, the Feedback Resonator allows you to shoot from a distance. This is essential for purifying the Angel Comb in the second area of the game.
tadpole upgrade module
Tadpoles allow us to reach deeper parts of the ocean without worrying about oxygen tanks. However, the basic version of Tadpole has limited features. To get the most out of it, you'll need to find new blueprints, craft new modules, and add them to empty upgrade slots.
Depth Module Mk. 1

- Blueprint location: It travels 268 meters at 155 degrees. You will notice a hole in the cliff below. Go down through the series of holes until you find the blueprint next to the wrecked tadpole.
- Recipe: Celestine (3x), enameled glass (2x), system chip (1x)
You will need the Depth module to access most advanced material. Some of these resources occur in water depths exceeding 400 meters. Even if you swim towards them, you won't be able to survive due to lack of oxygen.
That's why the Depth module is the first upgrade you should focus on, as it allows you to explore the Metal Farm and easily eliminate the Bloom Biofilm (using the Feedback Resonator) to get the buff inside the Angel Comb.
strike armor

- Blueprint location: In Alien Ruins, travel 203 meters in a 195-degree direction while diving deeper into the ocean. You can find the blueprint on a platform with a bunch of crates.
- Recipe: Enameled Glass (2x) and Strontium (2x)
This is a completely optional upgrade. Strike Armor allows Tadpole to take less damage each time it is hit.It is caused by reckless driving or attacks by hostile creatures.
Knowing that you can quickly repair your Tadpole using a repair tool, the Strike Armor isn't really a game changer. You can easily skip this step and focus on better, more useful upgrades.
cavitation muffler

- Blueprint location: From the Angel Comb in the Alien Ruins area, head northeast until you reach the Metal Farms. Hugging the cliff to the left, you'll find a platform above it, partially buried under sand.
- Recipe: Titanium (3x), Strontium (2x)
Using the Cavitation Muffler makes your presence unknown to hostile creatures unless you get too close.
This provides better protection compared to Strike Armor. It is better to remain stealthy and deter hostile creatures than to prepare for dangerous encounters and unwanted attention.
solar charger

- Blueprint location: It is located in the same crashed base where the Bioscanner is located. From Alien Ruins, travel 540 meters in a direction 125 degrees. The blueprints are located inside the Cicada Shipwreck.
- Recipe: Copper Ingot (1x), Strong Acid (1x), Troilite (1x)
Ideally, you should have two charging docks for your tadpoles. One is near the Alien Ruins and the other is near the Lifepod. But with a solar charger, you can extend your explorations during the day.
With this upgrade, The power cells inside the tadpole recharge automatically as long as they are in shallow water and during the day. This is more useful when exploring the first area of the game. When you're in the deeper parts of the Alien Ruins, you won't get much out of the solar charger since it's not considered shallow water.
engine efficiency

- Blueprint location: Located inside the base of the Alien Ruins. Go inside through the hatch and go right to find a blueprint.
- Recipe: Titanium Ingot (1x), Glass (2x), System Chip (1x)
Engine efficiency works much better than solar charger. Instead of charging power cells under certain conditions, Engine Efficiency reduces the power the Tadpole's engines draw from the power cell by 20%..
The good news is These upgrades can be stacked. Tadpole has four module slots, all of which can be equipped with engine efficiency to reduce power usage by up to 80%.
The Depth module is very important for deeper exploration, so you'll need to take out one of those Engine Efficiency modules and put it into the Depth module. However, you can still use 60% more power, significantly extending your exploration period.
