In adopting a storybook visual style, Cinderia It has a fairly unique look, but the boss fights take a lot of fairytale inspiration and take some creative freedom in their own right.
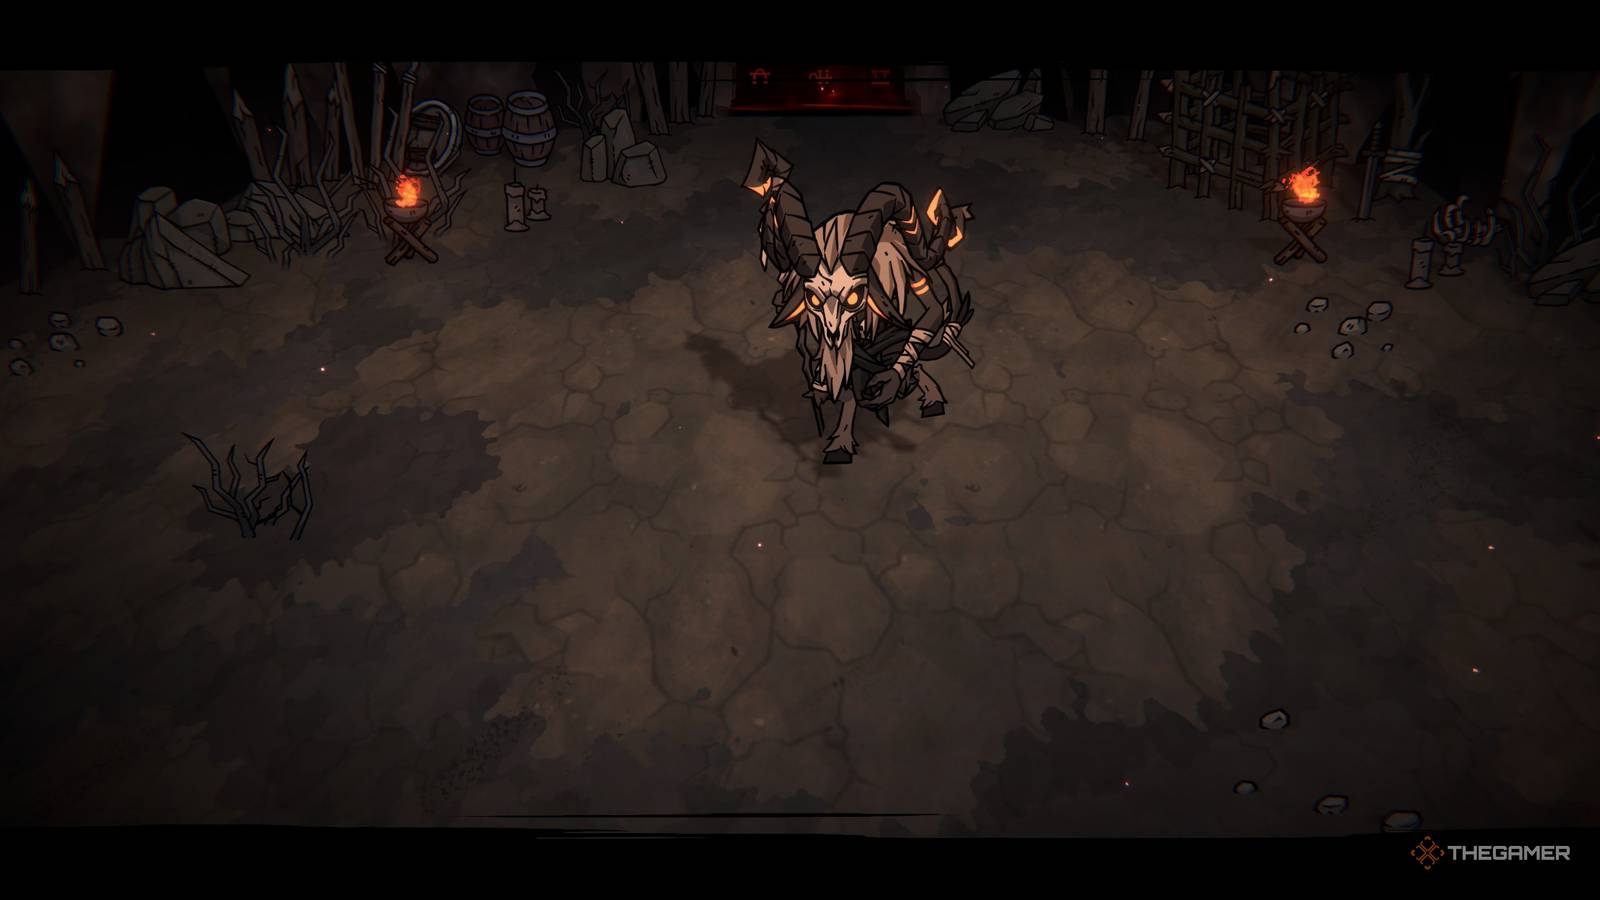
Kabraks the Soulrend, the incredibly verbose High Sacrificer of the Darkhorn Clan, is a giant goat sometimes reminiscent of Baphomet, and has the power to back it up.
Where did the Darkhorn clan's victims fight?

Kabraks the Soulrend is the third boss of the game.It is also found in the third area, the Mines. This follows both the Ashen Adjudicator in Town Ruins and the Fairy Queen in the LIghtless Forest.
Make sure you are ready to go in as usual. he is very mobileIt has many additional abilities needed to dash across the arena and deal high damage quickly.

Cinderia: Ashen Judicator Boss Guide
Cinderia's first boss will still test your speed.
High-ranking victim of the Darkhorn Clan Moveset

High Sacrificer is a very interesting boss. Their move sets vary dramatically depending on the stage. The first stage involves fighting across the entire arena and making a lot of tactical plans. The second stage becomes more of a boxing match where quick movements are important.
Step 1
In stage 1 Bosses place totems throughout the arena. By chasing you around. This is the exact opposite of the Fairy Queen. You outrun him and track down the totem.
All of his attacks are as follows:
|
attack |
explanation |
|---|---|
|
Chasing Strike |
Your boss will actively seek out you and attack employees when they approach you. This attack can last until they reach you, so don't dodge until they actually reach you. |
|
radial slash |
The boss will quickly spin around and attack the surrounding area with his employees. This can be done on its own, but is most commonly done after performing a Chasing Strike. |
|
Totem Summoning |
Bosses summon totems throughout the arena. These have no effect on their own, but they do work when the boss performs a Totem Burst. These should be destroyed as quickly as possible. |
|
ground burst |
The boss will follow you for a few seconds and then summon an exploding red circle below you. All you have to do to avoid this is run. |
|
totem burst |
Bosses trigger specific totems. It flashes red for a few seconds before exploding, releasing a massive shockwave throughout the arena. Normally only one totem explodes at a time, but bosses can explode their totems in quick succession, making it difficult to avoid them all. |
Step 2
In the second step Reached when the boss's HP remains at about 30%They massively limit not only the playing field, but also their own move sets.
|
attack |
explanation |
|---|---|
|
totem arena |
When the second phase begins, the boss summons a series of totems that form an arena in the center of the room, uniting you and him. There is no way to avoid this and it will remain until the end of the battle. |
|
Summon Enemy |
The boss will summon medium-sized enemies to assist them in the Totem Arena. This enemy is weak but can easily catch you off guard. They must be defeated, but the boss can summon them again after a delay. |
|
attack combo |
Bosses lose lunge strikes and radial slashes. Instead, they only attack in the direction the boss is facing, but they get a combo string that performs swings and slams. |
How to defeat the Darkhorn tribe's victims

In the first step You'll want to spend half the battle destroying the boss's totemsThe other half attacks the boss. In general, Totem Burst is very powerful, so you should prioritize Totems.
This means the boss can re-summon the totem very quickly. if If you see a totem with full HP glowing red, don't try to destroy it. Instead, be prepared to dodge it and use that time to attack the boss.
Chase is an attack you need to watch out for. If you dodge too early, the boss will catch up and attack you.. And because of Radial Slash, you'll always want to avoid them.
It's easy to panic in the second stage, but Boss movements have also been simplified.. They can summon enemies to help you, so you need to take them out immediately.
Backstabbing is essential as the boss moves very slowly.The recovery period after an attack is long. Here, it's a good idea to invest in accessories that increase critical damage and other surprise buffs.
And once you defeat them, you are free to move to the next area.

Cinderia: 8 Beginner Tips
Make yourself the most powerful witch hunter!
